Control Siglent SDG1025 with python (bonus: add web access using any SBC)
Intro
When you’re an electronic engineer you have some standard equipment on your bench. A few multimeters, a soldering station, a bench-top PSU and an oscilloscope. Some of us have also a frequency counter and a waveform generator. If your equipment is quite new then probably it has some kind of communication interface to connect and control the device remotely. That’s very useful in some cases, because you can do a lot of fancy things. The problem usually is that if you’re a Linux user, then you don’t this that easy, as the EE world is dominated by Windows. Nevertheless, nowadays there are solutions sometimes, which are also open source and that makes it easy to take full control.
This post is about how to control the Siglent SDG1000 waveform generator series using Python. I own an SDG1025, so I’ve only tested on this, but it should be the same for all the series.
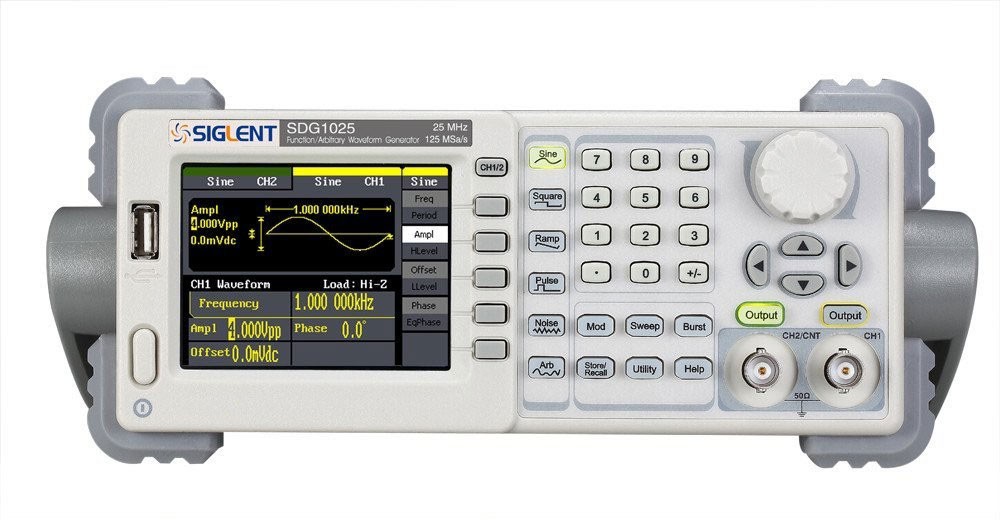
Siglent SDG1025
A few words about SDG1025, though if you’re reading this you probably already have it already on your bench. SDG1025 is an arbitrary function generator that is able to output a maximum frequency of 25MHz for sine, square and Gaussian noise; but less for other signals (e.g. 5MHz for pulse and arbitrary waves). It has a dual channel output and the second channel can also be used as a frequency counter.
This is the device user manual with more info and that’s how it looks like.
What makes SDG1025 special is its price and the features that comes with this. This is not a hobbyist neither a pro equipment, regarding the price range. It lies somewhere in the middle, but by doing a very small and easy modification it gets in the semi-pro range. This modification is to change the XTAL on the motherboard with a better TCXO, as the motherboard has already the footprint and also it’s an easy to do modification. You can find 25MHz TCXOs with 0.1 or 0.3 ppm in ebay for ~15-10 EUR and this will make the input/ouput much more accurate. It is questionable though if those old format TCXOs are capable of such low ppm accuracy, but in any case with a bit more effort you can also use a new SMD TCXO as long as it has TTL level output. This is a video that shows this modification, if you’re interested.
Another big plus of SDG1025 is the USB communication port. This port is used for communication between your workstation and the instrument and it supports the Virtual Instrument Software Architecture (VISA) API.
The only negative thing I can think of about the SDG1025, is that the fan is loud. I think that would be probably my next hack on the SDG1025, but I don’t use it that often to really consider doing it, yet.
VISA API
VISA is a standard communication protocol made by various companies, but you probably know it from the National Instrument’s NI-VISA, which is used in LabView. This protocol is available over Ethernet, GPIB, serial, USB e.t.c. and it’s quite a simple protocol where the host queries the device and gets the devie sends a response to the host. The response can be some meaningful data or just an acknowledgement of the received command.
The problem with VISA is that almost all the tools and drivers are made for Windows. You see LabView was a big thing in the Windows XP era (and I guess it still probably is in some industries) as it was easier for people who didn’t know programming to create monitoring and control tools and create automations using LabView. Of course, a lot of things have changed since then and to be honest I’m not aware of the current state of LabView. At some point I believe it was used also from engineers who knew about programming, but at the time LabView had become a de facto tool in the industry and also people preferred the nice GUI elements that it was offering. I remember at that time (early 2000’s) I was using Borland’s VCL components with Borland C++ and Delphi to create my own GUIs for instrument control, instead of LabView. I remember I was finding easier to do use VCL and C++ than use the LabView workflow. Oh, the VCL! It was an awesome library ahead of its time and I wonder why it didn’t conquer the market…
Anyway, because Windows are favored when it comes to those tools, the Linux users are left behind. Times have changed though and although Linux should be considered as the main development platform, some companies are left a bit behind or they provide solutions and support only to specific partners.
USB Port
Now let’s get back to the SDG1025. In the rear side of the generator there’s a USB port, as you can see from this image.
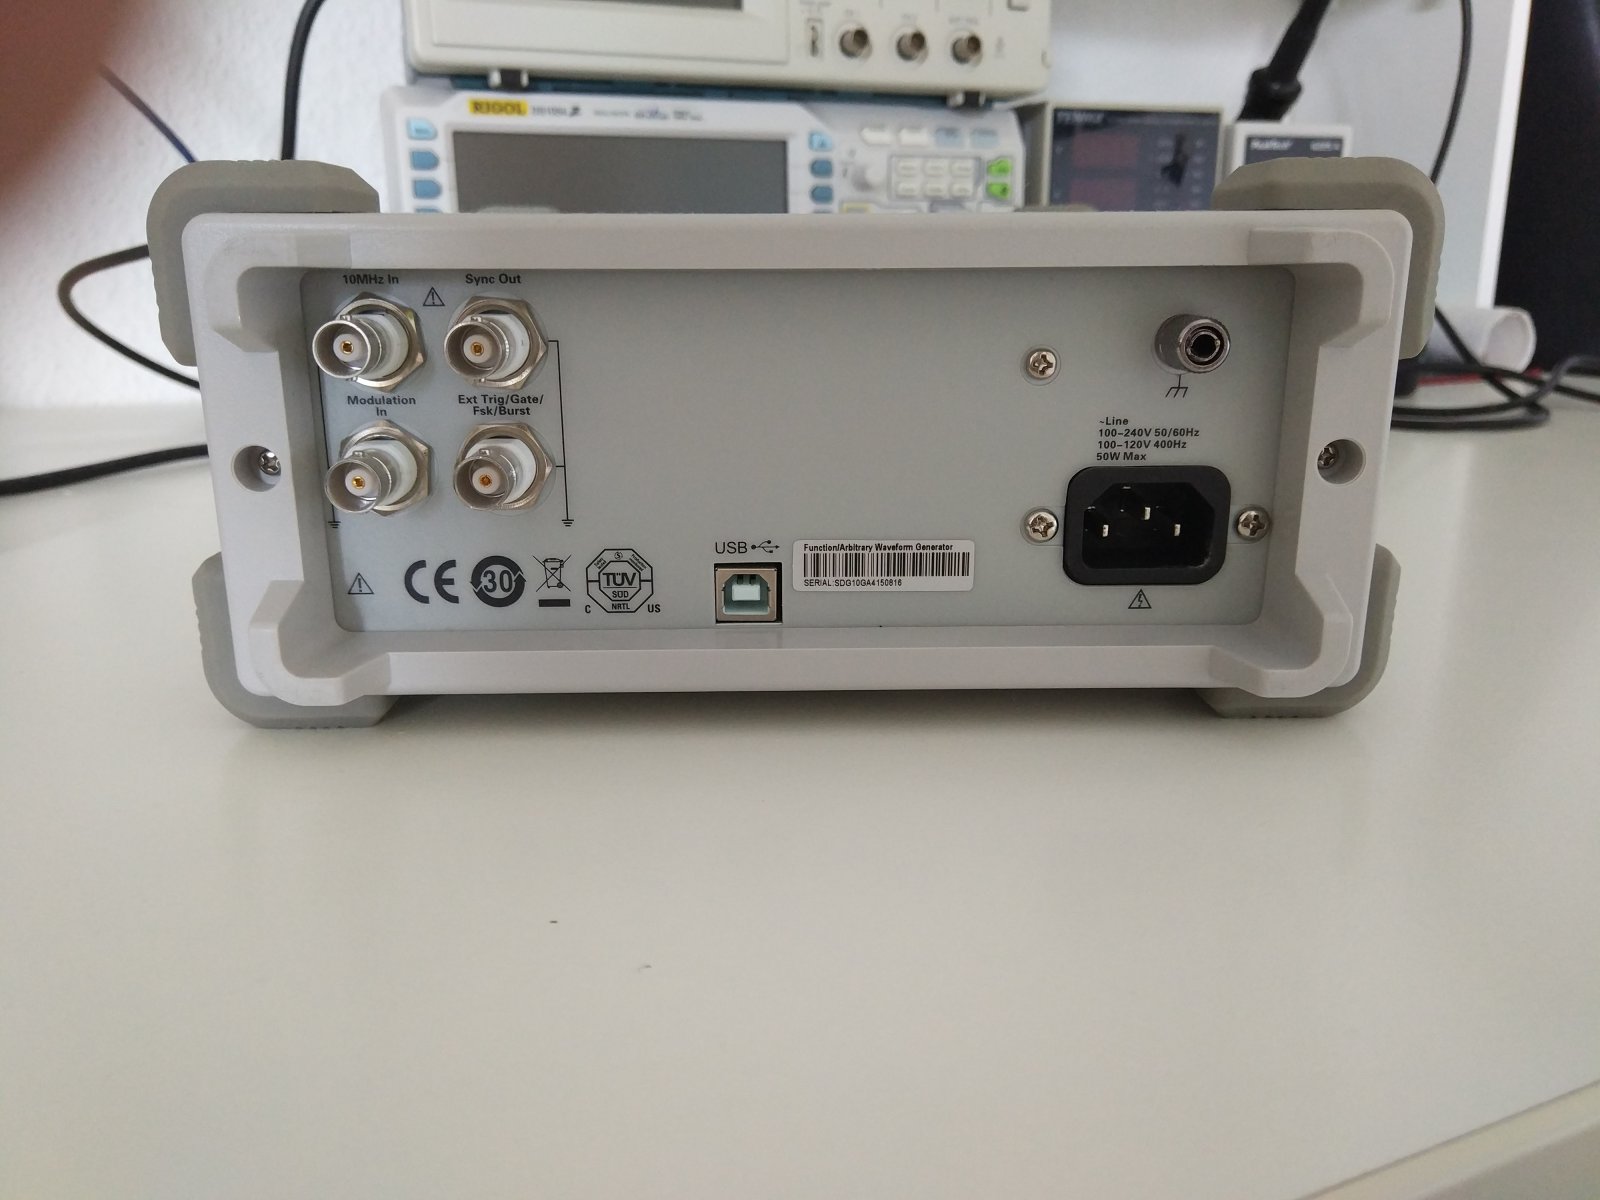
That USB port is used for communicating with your workstation and it supports two modes of operation, USBRAW and USBTMC.
USBTMC stands for USB Test and Measurement Class. You might know this already from those cheap 8-ch, 24MHz network analyzers that sold on ebay and some of which are based on the CY7C68013A EZ-USB. Those analyzers claim compatibility with Sigrok software suite, which supports USBTMC.
Supporting USBTMC, doesn’t mean that your device is supported (e.g. SDG1025). It only means that your device supports that class specification; therefore you could integrate your device to Sigrok if you like, but you have to add the support. So, it’s just a protocol specification and not the communication protocol specific details, which are different and custom for each device and equipment.
So, let’s go back to the SDG1025. You can select the USB mode by pressing the Utility button and browse to this menu [Utility >> Interface >> USB Setup]. There you’ll find those two options:
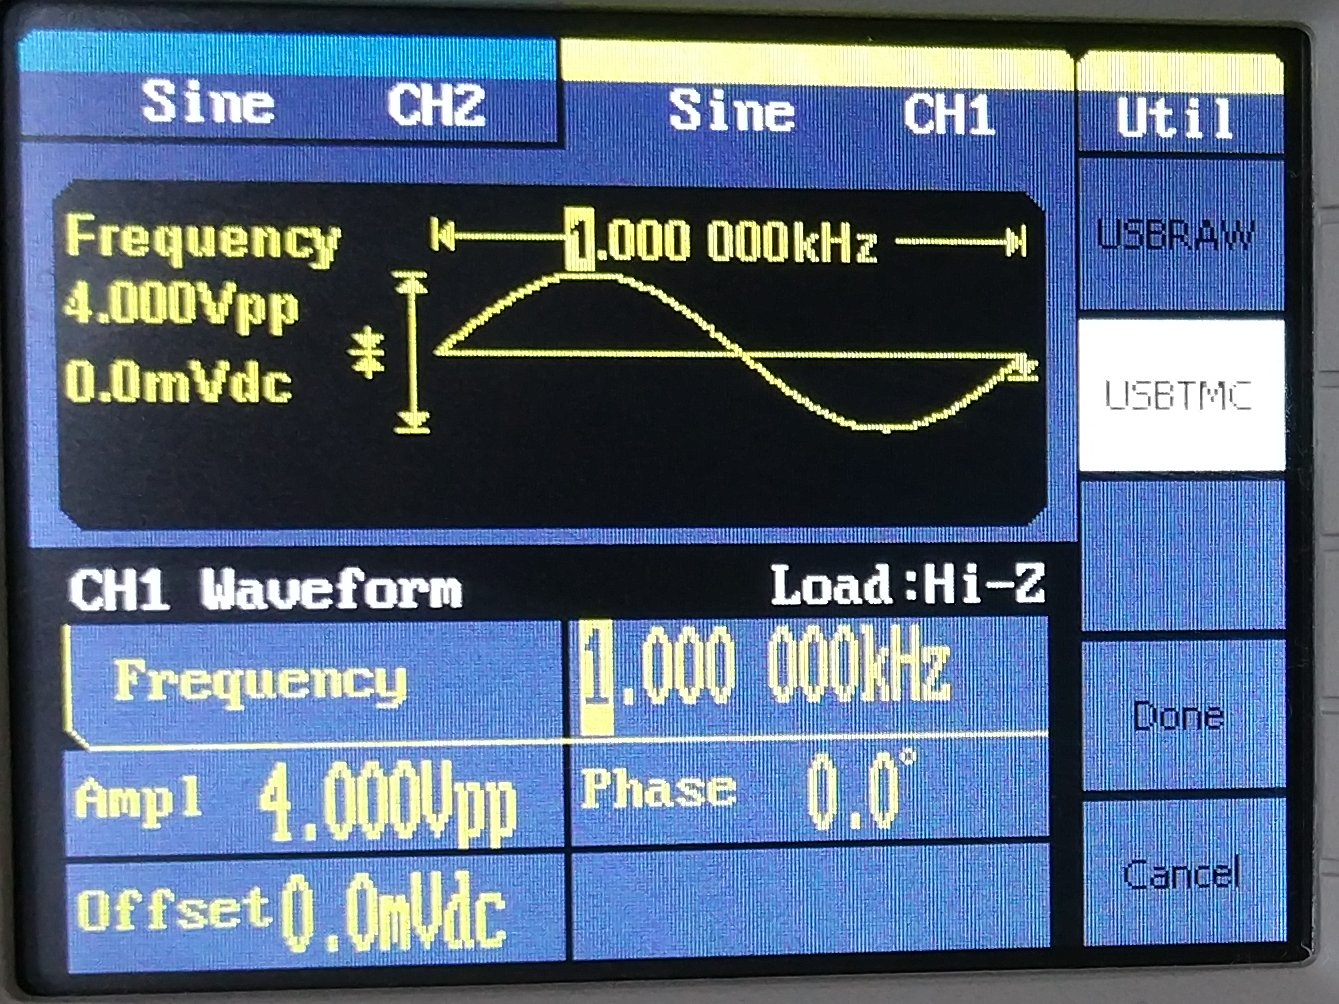
In this menu you need to select the USBTMC option.
Now connect the USB cable to your Linux machine and run the lsusb command which should print a line like this.
1
2
$ lsusb
Bus 008 Device 002: ID f4ed:ee3a Shenzhen Siglent Co., Ltd. SDG1010 Waveform Generator (_TMC mode_)
That means that your workstation recognises the SDG1025 and it’s also set to the correct mode (USBTMC). Now all is left is to be able to communicate with the device.
Host controller
Usually when you want to control an equipment you need to use your workstation. But that’s not always the case, as you could also use a small Linux SBC. Therefore, in this post I’ll assume that the host controller is the nanopi-neo SBC, which is based on the Allwinner H3 that has a Quad-core Cortex-A7 that runs up to 1.2GHz. This small board costs $10 and it’s powerful enough to perform in some tasks better that other more expensive SBCs.
Therefore, since we’re talking about Linux you have the flexibility to use whatever hardware you like as the host controller. In this case, the nanopi-neo can convert actually the SDG1025 to an Ethernet controlled device, therefore you can use an SBC with WiFi to do the same and control the SDG1025 via your WiFi network. Anyway you get the idea, it’s very flexible. Also the power consumption of these small SBCs is very low, too.
Therefore, from now on the commands that I’m going to use are the same regardless the host controller. Finally, for the nanopi-neo I’ve built the Armbian 5.93 git version, but you can also download a pre-built image from here.
Communicate with the SDG1025
Let’s assume that you’re have booted your Linux host and you have a console terminal. In general, when it comes to python, the best practise is to always use a virtual environment. That makes things easier, because if you break something you don’t break your main environment but the virtual. To setup your host, create a new virtual environment and install the needed dependencies, use these commands:
1
2
3
4
5
6
7
8
9
10
11
12
13
14
15
16
17
18
# Update system
sudo apt update
sudo apt -y upgrade

# Install needed packages
sudo apt install python3-venv
sudo apt install python3-pip
sudo apt install libusb-1.0-0-dev

# Creae a new environment
mkdir ~/pyenv
cd ~/pyenv
python3 -m venv sdg1025
source ~/pyenv/sdg1025/bin/activate

# Install python dependencies
pip3 install setuptools
pip3 install pyusb
After the running the source ~/pyenv/sdg1025/bin/activate command, you should see in your prompt the environment name. For example, on my nanopi-neo I see this prompt:
1
(sdg1025) dimtass@nanopineo:~$
That means that now you’re working on the virtual environment and all the python modules you’re installing are installed in that environment. To deactivate the virtual environment you run this command
1
deactivate
Finally, you always need to activate this environment when you need to communicate with the sdg1025 and use those tools.
1
source ~/pyenv/sdg1025/bin/activate
If everything works fine for you and you didn’t brake anything in the process, then if you don’t like using this virtual env, you can just install the same tools as before without creating the virtual env and skip those steps. From now on though, I’ll assume that the virtual env is used.
Now you need to create a udev rule, so your user gets permissions to operate on the USB device, as by default only root has access to that. If you remember in a previous step, you’ve run the lsusb command and you got an output similar to this:
1
2
$ lsusb
Bus 008 Device 002: ID f4ed:ee3a Shenzhen Siglent Co., Ltd. SDG1010 Waveform Generator (TMC mode)
From this output you need the USB VID and PID numbers which are the f4ed and ee3a in this case. Your SDG1025 should have the same VID/PID. Now you need to create a new udev rule with those IDs.
1
sudo nano /etc/udev/rules.d/51-siglent-sdg1025.rules
And then copy this line and save the file.
1
SUBSYSTEM=="usb", ATTRS{idVendor}=="f4ed", ATTRS{idProduct}=="ee3a", MODE="0666"
Now you need to update and re-trigger the rules with this command:
1
sudo udevadm control --reload-rules && sudo udevadm trigger
If you haven’t already connected the USB cable from the SDG1025 to your host, you can do it now.
python-usbtmc
The last piece you need is the python-usbtmc module, which you can download from here:
https://github.com/python-ivi/python-usbtmc
This is the module which implements the USBTMC protocol and you can use to script with python. To install it run those commands:
1
2
3
4
5
git clone https://github.com/python-ivi/python-usbtmc
cd python-usbtmc
sudo python setup.py install
cd ../
rm -rf python-usbtmc
If everything went smoothly then now you should be able to test the communication between the host and the SDG1025. To do this launch python3 and you should see something like this:
1
2
3
4
5
(sdg1025) $ python3
Python 3.6.8 (default, Jan 14 2019, 11:02:34)
[GCC 8.0.1 20180414 (experimental) [trunk revision 259383]] on linux
Type "help", "copyright", "credits" or "license" for more information.
>>>
The next commands are used to import the python-usbtmc module and list the connected USBTMC devices that are connected on the system
1
2
3
>>> import usbtmc
>>> usbtmc.list_resources()
['USB::62000::60000::SDG10GA1234567::INSTR']
As you can see, the list_resources() function listed the SDG1025. Now you need to copy this exact string and use it to instantiate a new instrument object.
1
>>> sdg = usbtmc.Instrument('USB::62000::60000::SDG10GA1234567::INSTR')
In your case this string will be different, of course, as it also contains the device serial number. Now you can poll the device and get some basic information.
1
2
>>> print(sdg.ask("*IDN?"))
*IDN SDG,SDG1025,SDG10GA1234567,1.01.01.39R5,04-00-00-30-28
The *IDN? is a standard protocol command that sends back some basic information. In this case it’s the device name, serial number and firmware version.
You’re done! Now you can control the SDG1025 via USB.
Supported commands
The SDG1025 supports a lot of commands that pretty much can control all the functionality of the device and there’s a full list of the supported commands in this document. Yes, it’s a quite large document and there are many commands in there, but you don’t really need them all, right? You should have a look at all in order to decide which seem more interesting for you to create some custom scripts. The very basic commands, I think, are the BSWV (BASIC_WAVE) and OUTP (OUTPUT).
The BSWV sets or gets basic wave parameters and you can use it to control the output waveform. To read the current output setup of channel 1 run this:
1
2
>>> sdg.ask("C1:BSWV?")
'C1:BSWV WVTP,SINE,FRQ,1000HZ,PERI,0.00100000006S,AMP,4V,OFST,0V,HLEV,2V,LLEV,-2V,PHSE,0'
As you can guess C1means channel 1, so for channel 2 you should run this
1
2
>>> sdg.ask("C2:BSWV?")
'C2:BSWV WVTP,SINE,FRQ,1000HZ,PERI,0.00100000006S,AMP,4V,OFST,0V,HLEV,2V,LLEV,-2V,PHSE,0'
Therefore, if you want to set the CH1 frequency to a 3V3, 10MHz, square output, you need to run this:
1
>>> sdg.write('C1:BSWV WVTP,SQUARE,FRQ,10000000,AMP,3.3V')
As you can see though, the BSWV command only configures the output, but it doesn’t also enable it by default. You need the OUTP command to do that. Therefore, to enable the CH1 output with that configuration you need to run this
1
>>> sdg.write('C1:OUTP ON')
You can disable the output like this:
1
>>> instr.write('C1:OUTP OFF')
Finally, you can query the output state like this
1
2
>>> sdg.ask('C1:OUTP?')
'C1:OUTP OFF,LOAD,HZ,PLRT,NOR'
From the response, you see that you can also control the output load (LOAD) and the polarity (PLRT). NOR means that the polarity is normal, but you can set it to INVT if you want to inverse it.
At this point it should be clear what you can do with this module and the supported commands. Now that you know that you can script with python and control the device, you can understand how many things you can do. It’s awesome!
Just read the Programming Guide document and do your magic.
Bonus: Create a web control using the nanopi-neo
This wouldn’t be a proper stupid project if this was missing, so I couldn’t resist the temptation. As bonus material I’ll show you how to use the nanopi-neo (or any other SBC) to do some basic control on the output via a web interface using python, flask and websockets. I won’t really get into the code details, but the code is free to use and edit and you can get it this repo:
https://github.com/dimtass/web-interface-for-sdg1025
In order to run the code you need to follow all the commands in the previous sections to install a virtual env and python-usbtmc. Additionally, you need to install a couple of things more in order to support flask and wtforms on which my web interface is based on. In my case I’ve used the nanopi-neo and also my workstation and it worked fine on both. Now type those commands:
1
2
3
4
pip3 install flask
pip3 install wtforms
pip3 install flask-socketio
pip3 install eventlet
The last command which installs the eventlet package may fail, but it doesn’t really matter. This package is for installing the eventlet async mode, which makes websockets faster. Without it the default mode is set to threading, which is still fast but not that fast (I’ve seen around 2ms ping times using websockets with eventlet and ~30ms with threading).
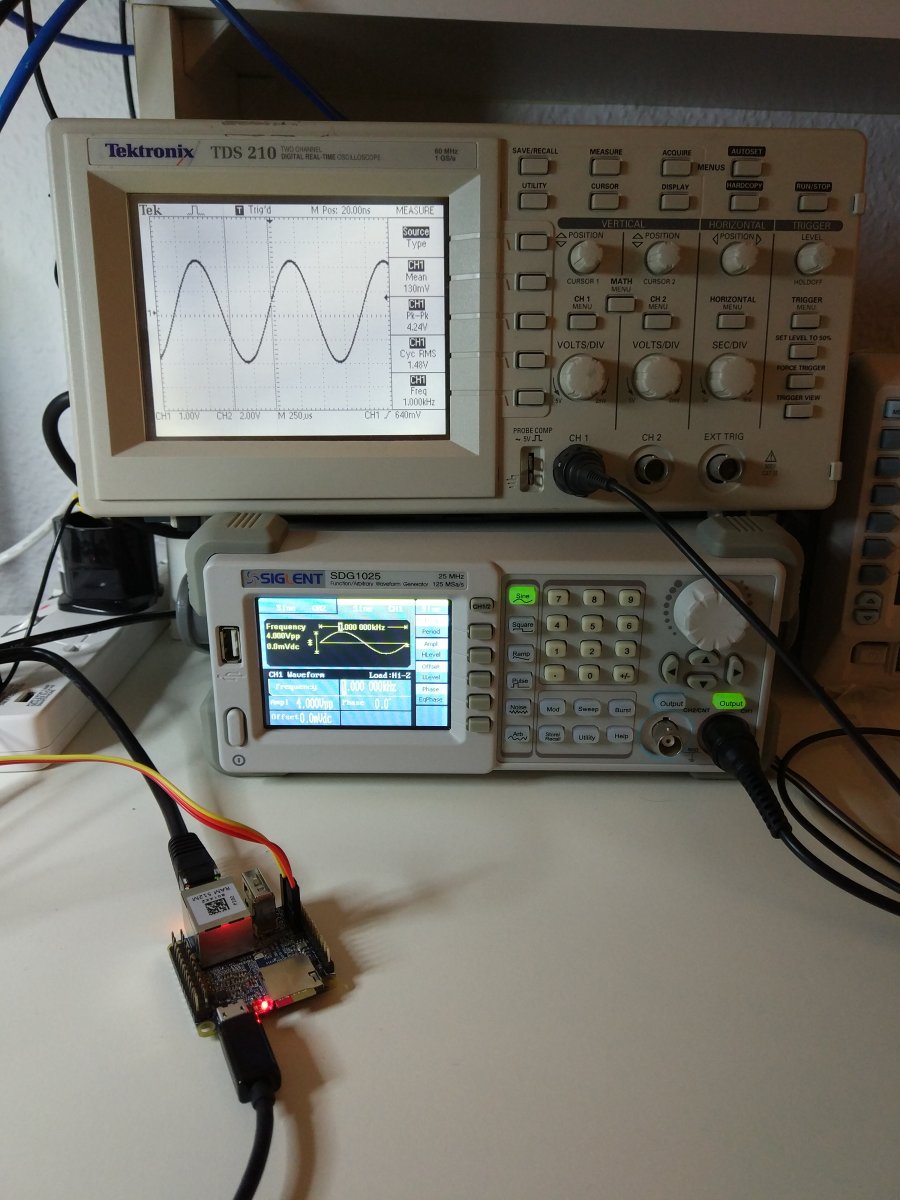
Now that you’ve installed the packages, you can run the code, but first you need to connect the USB cable on the nanopi-neo (or whatever) and the SDG1025. This is everything connected together (in the photo the web-interface is already running).
Now, run these commands (includes also the repo clone).
1
2
3
git clone git@github.com:dimtass/web-interface-for-sdg1025.git
cd web-interface-for-sdg1025
python3 sdg1025-web-interface.py
And that’s it. You should see in the output messages like the following:
1
2
3
4
[SDG1025]: Connecting to the first available device: USB::62701::60986::SDG10GA4150816::INSTR
[SDG1025]: Connected to: SDG10GA4150816
Starting Flask web server...
Open this link to your browser: http://127.0.0.1:5000/
That means that everything worked fine. Now, if the web app is running on the nanopi-neo (or wherever), open your browser and connect to its IP address and port 5000. And you will see something like this:
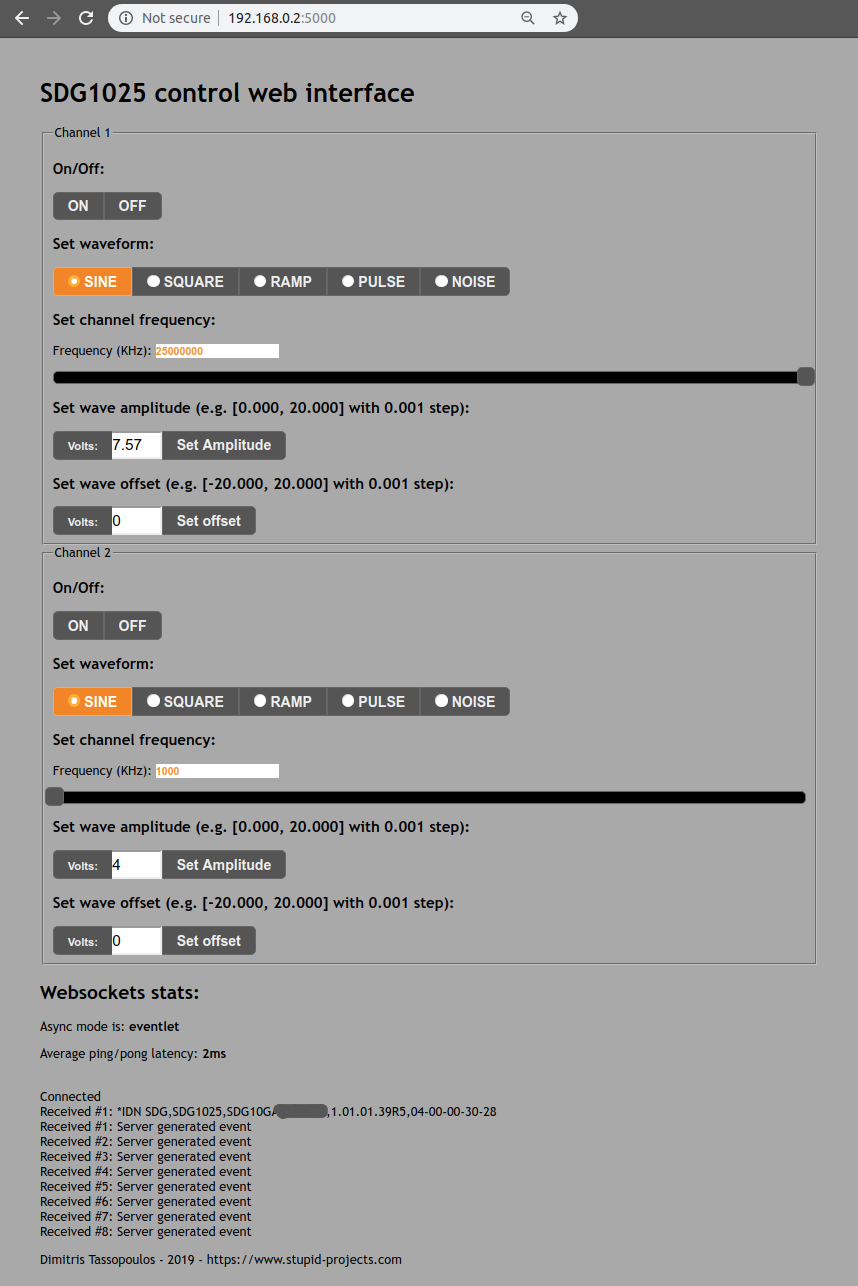
Note: in the picture the frequency should be (HZ) and not (KHz), but I’ve fixed that in the repo.
When the interface is opened, then it reads the current configuration for both channels and then updates all the needed elements on the web interface. You can use the controls to play around with the interface. I’ll also post a video that I’ve made using the nanopi-neo running the web server and my tablet to control the SDG1025. Excuse some delays when using controls on my tablet, but it’s because the touch screen is problematic. I won’t buy a new tablet until is completely fallen apart. For now it serves its purpose just fine.
Conclusions
Most of the new equipment are coming with some kind of communication interface, which is really nice and you can use it to perform a lot of automated tasks. The problem is that most of those devices support Windows only. This is an old habit for most of the companies as they either can’t see the value in supporting Linux platforms or the engineers are still left in the 00’s era where Windows XP was the ultimate platform for engineers.
Anyway, for whatever the reason, there is hope if your equipment supports a standard protocol or class; because then you can probably find (or develop your own) module and then do whatever you like. For the SDG1025 I’ve used the python-usbtmc module which is open and available here. I’ve also used Flask to develop a web app. The front-end is made with HTML, javascript (jquery + jquery-ui) and the back-end is written in Python. The reason I’ve used Flask, is because it was easier to integrate the python-usbtmc module in the web app and Flask is really nice and mature enough and it has a very nice back-end that integrates also the web server, so you don’t need to install one. Anyway, I also like Flask, so I use it whenever python is involved.
This web app is a very basic one and I’ve made it just for fun. I’ve only supported setting the outputs, but you can use it as a base template to do whatever you like and add more functionality. You can make tons of automation using Python scripting and the SDG1025, it’s up to your imagination.
Have in mind, that I’ve noticed some times that the communication was broken and I had to restart the device. I didn’t find the cause it as it wasn’t often, but I suspect the device…
That was my last stupid project for the next few months as I plan to have some rest and make some proper holidays.
Have fun!
Comments powered by Disqus.