A Yocto BSP layer for nanopi-neo3 and nanopi-r2s
Intro
Having a tech blog comes with some perks and one of them is receiving samples of various SBCs. This time FriendlyElec sent me two very nice boards, the new nanopi-neo3 and the nanopi-r2s. Both SBCs came with all the extra options including a heatsink and case and they look really great. So, I’ve received them yesterday and I had to do something with then, right?
As you expect, if you reading this blog for some time, I won’t do a product presentation or review, because there are already many reviews that pretty much cover everything. Nevertheless, I’ve done something more challenging and fun that might be also helpful for others and that is that I’ve created a Yocto BSP layer for those boards that you can use to create your custom Linux distribution.
Similarly to the meta-allwinner-hx, I’ve based the BSP layer on the Armbian image. The reason for that is because the Armbian image is very well and actively supported, which means that you get updated kernels and also other features, including extended wireless support. Therefore, this Yocto layer applies the same u-boot and kernel patches as Armbian and at the same time allows you to create your own custom distribution and image.
Nanopi-R2S
The nanopi-r2s and nanopi-neo3 share the same SoC and almost the same schematic layout, which means that they also share the same device-tree. This is very convenient as it makes it easier to update both BSPs at the same time. At the same time, though, they have also significant differences which makes them suitable for different purposes.
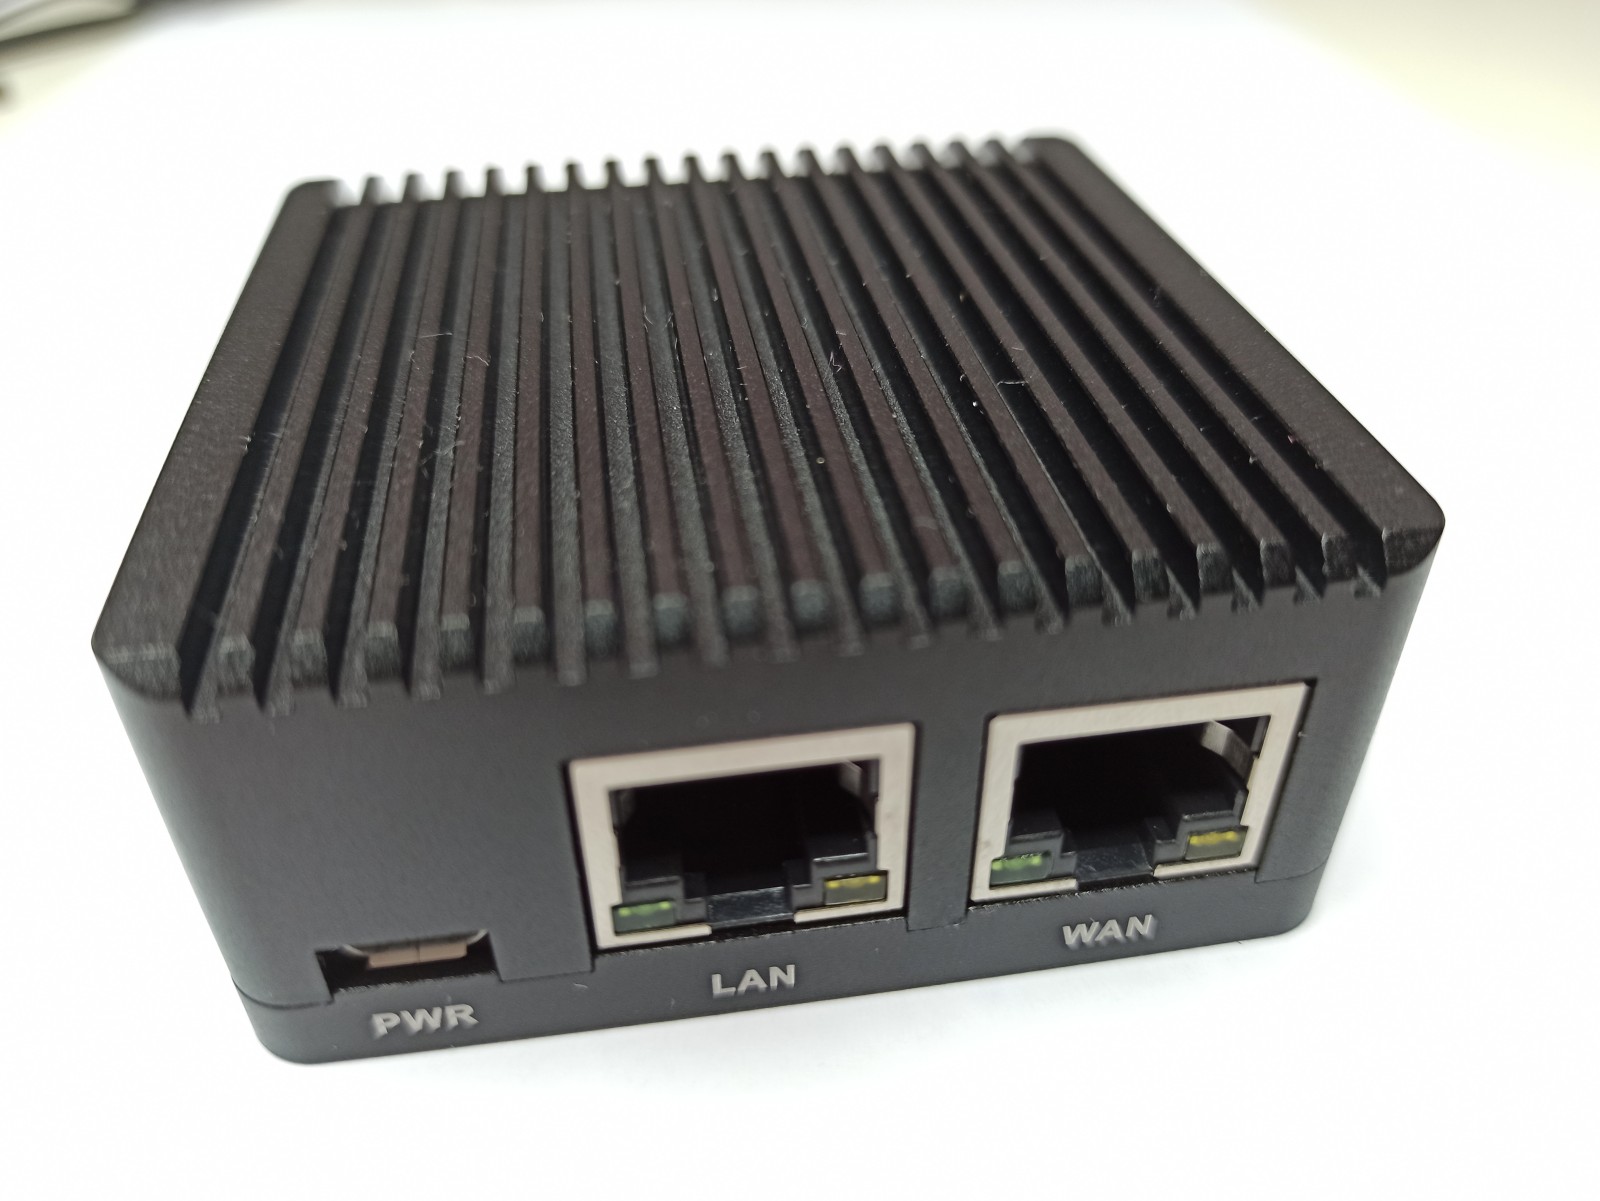
The nanopi-r2s is based on the Rockchip RK3328 SoC which is a Quad-core Cortex-A53 with each core running at 1.5GHz. You might already know this SoC as it’s being used a lot in various Android TV boxes that being sold in ebay and many Chinese tech sites. In 2018 there was a peak in the release of such TV boxes. Nevertheless, the R2S is not a TV box, but the PCB layout reminds more a network gateway.
This is the R2S I’ve received that came with the metal case.
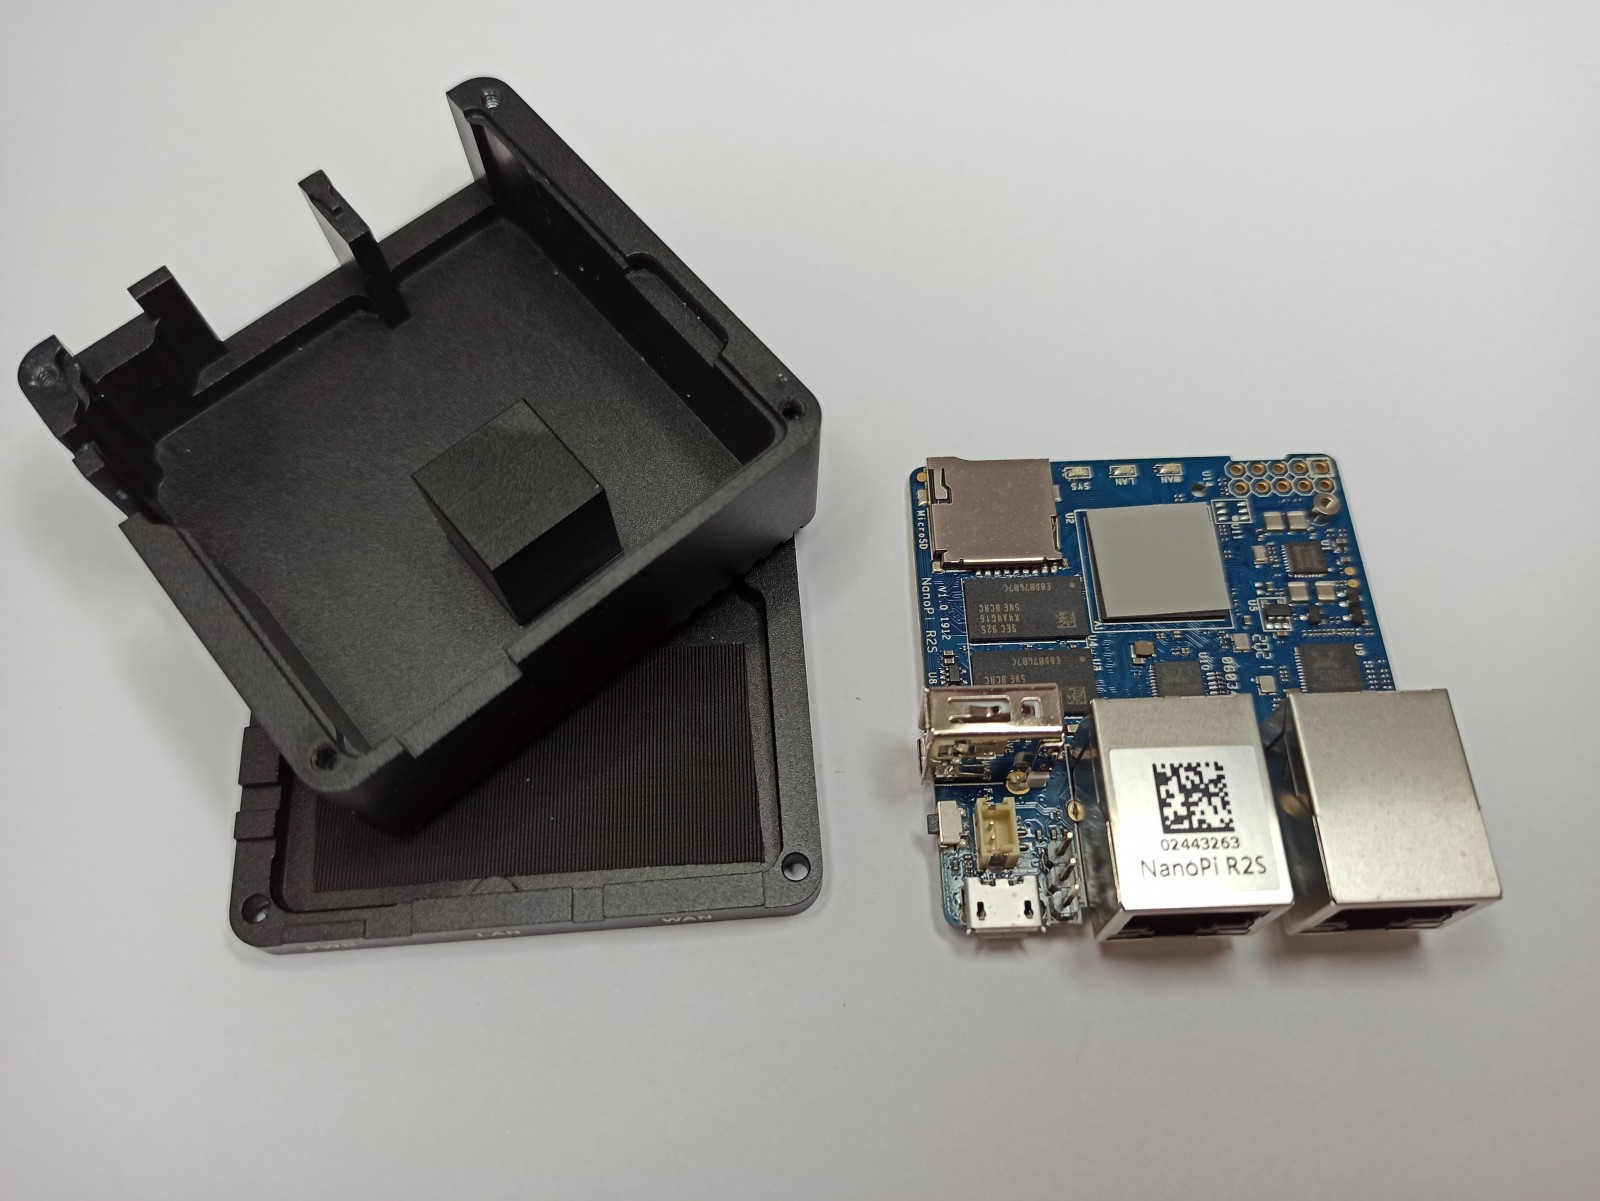
And this is how it looks when opened.
The board has the following specs:
- 1 GB DDR4 RAM
- 1x internal GbE ethernet
- 1x GbE ethernet (using a USB3.0 to Ethernet bridge IC)
- 1x USB2.0 port
- Micro SD
- micro-USB power port
- 10x pin-header with GPIOs, I2C, IR receiver and UART
As you can see from the above image the case has an extruded rectangle which is used as a the SoC heatsink. The problem I’ve seen is that the silicon pad on the SoC is not thick enough and therefore the contact is not that good, which means that the heat dissipation might be affected negatively. In my case I’ve resolved this by using a thicker thermal silicon pad on the SoC.
FriendlyElec provides an Ubuntu and OpenWRT image for the board, which I haven’t tested as I’ve implemented my own Yocto BSP layer and image. I’ve read some people complaining about that it doesn’t have some things that they would like, but I guess nobody can be 100% satisfied with a SBC and also it’s not possible for all SBCs to fit all cases. From my point of view this BSP is ideal if you need a quite powerful CPU and two GbE ports.
Personally I’m thinking about implementing a home automation gateway with this board and use one GbE to connect to a KNX/IP bus and the other to the home network, hence keep the two domains separated with a firewall which is more secure.
Nanopi-neo3
The nanopi-neo3 is a really compact SBC with the same RK3328 SoC and it has a bit bigger size compared to the nanopi-neo2 board and smaller that nanopi-neo4 (RK3399). The plastic case is really nice and I can imagine having it in a place in my apartment which is visible as it would visually fit just fine. The specs for this SBC are the following:
- 2GB DDR4 (also 1GB available)
- 1x USB3.0 port
- 2x USB2.0 ports (in pinheader)
- Micro SD
- 5V fan connector (2-pin)
- Type-C power
- 26x pin-header with GPIOs, I2C, SPI, I2S, IR receiver and UART
As you can see the main difference is that there’s only one GbE port and there is also an extra USB3.0 port. This configuration makes it more suitable for sharing a USB3.0 drive in your home network or other IoT applications as it has a pin-header with many available interfaces.
FriendlyElec provides an Ubuntu and a OpenWRT image with the 5.4 kernel and the images are the same with the nanopi-r2s. Actually, since the SoC and the device-tree is the same you can boot both boards with the same OS in the SD card.
The Yocto BSP layer
As I’ve mentioned, generally I prefer custom build images with Yocto for the various SBCs that I’m using. That’s because I have more control on what’s in the image and also it’s more fun to build my own images. An extra benefit is that this also keeps me up to speed with Yocto and the various updates in the project. Also Yocto is perfect for tailoring the image the way you want it, provides provisioning and it’s fitted for continuous integration. Of course, you can use any other available pre-build image like the ones FriendlyElec provides or the Armbian images and then use Ansible for example to provision your image if you like. But Yocto is much more advanced and gives you access to every bit of the image.
OK, enough with blah-blah, the BSP repo is here:
https://github.com/dimtass/meta-nanopi-rockchip64 https://gitlab.com/dimtass/meta-nanopi-rockchip64
I think the README file is quite thorough and explains all the steps you need to follow to build the image. Currently it supports the new Dunfell version and I may keep updating it in the future if I have time, as my main priority is the meta-allwinner-hx BSP updates.
The image supports the 5.7.17 kernel version and it’s based on the mainline stable repo (the patches are applied on the upstream repo), which is really nice. Generally rockchip has a better mainline support compared to other vendors, so most of the patches are meant to support specific boards and not so much the SoC.
I’ve added here the boot sequence of the nanopi-neo3 board with the custom Yocto image:
As you can see, the board boots up just fine with the custom image which is based on the Poky distro. As you can imagine from now on sky is the limit with what you can do using these boards and Yocto…
Conclusions
The nanopi-neo3 and nanopi-r2s are two SBCs that are similar enough to be able to use the same Linux image, but at the same time they serve different purposes and use-cases. Personally, I like having them both in my collection and I’ve already thought a project for the nanopi-r2s, which is a home automation gateway for KNX/IP. I’ll come back again with another post for that in the future, as this post is only about presenting this Yocto BSP layer for those boards.
I spend a fun afternoon implementing this Yocto layer and I’m glad that both boards worked fine. It also seems that this is the first time that those boards are supported with a Yocto BSP layer and I’m really interested in finding how people are going to use it. If you do, please provide a feedback here in the comment.
Have fun!
Comments powered by Disqus.