Self-hosting docker registry and proxy on an arm64 SBC with a UI
Intro
Everyone the uses Docker knows already the benefits of being able to spin up a sandbox container that contains everything you need to perform a task, without having to install anything on your host or spend much time to resolve dependencies.
Sometimes though, users don’t really know the details of where those images are coming from. Because it’s just easy to pull an image and run a container, often devs not realize that those images where build by someone and their hosted in a specific server which is called registry. I guess most of the readers do know that, but sometimes even we need something more than that.
For example, I would prefer to host my own private images on my own server or I would like to be able to have access to images in my local network in case the internet is not available.
In this case, the solution is to host your own docker registry.
Since, this blog is more oriented to embedded and sometimes it’s not really clear how to do that on an aarch64 hardware, I’ve thought about writing this guide that you can use to host your own docker registry on any available SBC you have.
In this post I’m using the nanopi neo2 as my docker registry.
Nanopi neo2, is based on the Allwinner H5 SoC, which contains a quad-core Cortex-A53. The board also comes with 512MB of RAM, which might seem low but it’s more than enough for the purpose.
Docker proxy
Instead of just building a self-host docker registry, it’s nice to also have a docker proxy. That means that you can use your registry to mirror images from the docker-hub. Therefore, if you’re running pipelines that pull images then instead of relying on a remote registry, you can just use your self-host registry as mirror.
Setting up the board
First step is to set up the board. I suggest that you use Armbian and find any SBC that is supported. This means that you get an updated kernel and a very well setup OS which comes with some nice features.
In my case I’ve downloaded the latest version from the https server, but you can also build your image from the source.
Then use the Balena etcher to flash the image on an SD card. Then boot and follow the steps to configure your OS for the first time (root password, new user, e.t.c.)
After it’s booted login and run:
1
2
sudo apt update
sudo apt upgrade
In my case the uname is:
1
Linux nanopineo2 5.15.26-sunxi64 #trunk.0002 SMP Thu Mar 3 10:24:53 UTC 2022 aarch64 GNU/Linux
Configure armbian to run docker
In order to be able to run docker in your SBC you need to execute the following steps.
First edit your armbianEnv.txt and enable the docker optimizations:
1
vi /boot/armbianEnv.txt
Then add this line:
1
docker_optimizations=on
Reboot.
Install docker
After you’ve done with the previous steps install docker.io
1
2
3
4
sudo apt install docker.io
sudo usermod -aG docker $USER
newgrp docker
sudo apt install apparmor
The apparmor is needed from docker and it’s not installed by default.
Then install/get docker-compose:
1
2
3
wget https://github.com/docker/compose/releases/download/v2.5.1/docker-compose-linux-aarch64
mv docker-compose-linux-aarch64 /usr/bin/docker-compose
sudo chmod +x /usr/bin/docker-compose
You may need to update the version. Currently, the last version is
v2.5.1
Get this repo
1
2
git clone https://github.com/dimtass/docker-registry-sbc.git
cd docker-registry-sbc
I’ve created this repo based on the docker-registry-ui and I’m using the ui-as-standalone example.
Copy your ssh keys to your SBC from your host
To simplify the process of ssh and scp files from your host to the SBC you can run this command:
1
ssh-copy-id -i ~/.ssh/id_rsa <sbc-user>@<sbc-ip>
Now you can ssh without using credentials.
Create credentials (on your host)
Now on your host x86_64 run this to create the htpasswd file.
1
2
docker run --rm -ti xmartlabs/htpasswd <username> <password> htpasswd
scp htpasswd <sbc-user>@<sbc-ip>:~/docker-registry-sbc/registry-config
you need to replace the
<username>and<password>with the credentials you want.
Change your registry IP
You now need to change your registry IP address in the yaml files in the SBC. First you need to change the REGISTRY_URL in credentials.yml in the root folder with your sbc-ip. Then you need to change the Access-Control-Allow-Origin: IP in registry-config/credentials.yml.
Allow insecure registry on your host
By default docker doesn’t allow http registries for security reasons. Therefore, on your host you need to explicitly allow the unsecure registry. You can read more about that here.
On your host you can run this command:
1
docker info
Now verify that you see this:
1
2
 Insecure Registries:
  127.0.0.0/8
On your host you need to create this file:
1
sudo vi /etc/docker/daemon.json
Then add this:
1
{ "insecure-registries":["192.168.0.79:5000"] }
You need to replace the IP with your SBC’s IP.
Then restart the docker service:
1
sudo service docker restart
And check again that the registry IP is now allowed:
1
docker info
You should now see something like this:
1
2
3
 Insecure Registries:
  192.168.0.79:5000
  127.0.0.0/8
Run the registry server
Now on your SBC run this command inside ~/docker-registry-sbc
1
sudo docker-compose -f credentials.yml up
If everything is fine you should see something like this:
Click to expand…
1
2
3
4
5
6
7
8
9
10
11
12
13
14
15
16
17
18
19
20
21
22
23
24
25
26
27
28
29
30
31
32
33
34
35
36
37
38
39
[+] Running 3/3
 ⠿ Container ui-as-standalone-ui-1        Removed                                                                    0.1s
 ⠿ Container ui-as-standalone-registry-1  Removed                                                                    0.1s
 ⠿ Network ui-as-standalone_default       Removed                                                                    0.5s
dimtass@nanopineo2:~/docker-registry-ui/examples/ui-as-standalone$
dimtass@nanopineo2:~/docker-registry-ui/examples/ui-as-standalone$ docker-compose -f credentials.yml up
[+] Running 3/3
 ⠿ Network ui-as-standalone_default       Created                                                                    0.5s
 ⠿ Container ui-as-standalone-registry-1  Created                                                                    0.7s
 ⠿ Container ui-as-standalone-ui-1        Created                                                                    0.5s
Attaching to ui-as-standalone-registry-1, ui-as-standalone-ui-1
ui-as-standalone-registry-1  | time="2022-05-29T11:26:04.399239771Z" level=warning msg="No HTTP secret provided - generated random secret. This may cause problems with uploads if multiple registries are behind a load-balancer. To provide a shared secret, fill in http.secret in the configuration file or set the REGISTRY_HTTP_SECRET environment variable." go.version=go1.11.2 instance.id=f53bfead-3afc-4d5d-a652-6560ee54b574 service=registry version=v2.7.1
ui-as-standalone-registry-1  | time="2022-05-29T11:26:04.399483554Z" level=info msg="Starting upload purge in 43m0s" go.version=go1.11.2 instance.id=f53bfead-3afc-4d5d-a652-6560ee54b574 service=registry version=v2.7.1
ui-as-standalone-registry-1  | time="2022-05-29T11:26:04.399946205Z" level=info msg="redis not configured" go.version=go1.11.2 instance.id=f53bfead-3afc-4d5d-a652-6560ee54b574 service=registry version=v2.7.1
ui-as-standalone-registry-1  | time="2022-05-29T11:26:04.471960287Z" level=info msg="using inmemory blob descriptor cache" go.version=go1.11.2 instance.id=f53bfead-3afc-4d5d-a652-6560ee54b574 service=registry version=v2.7.1
ui-as-standalone-registry-1  | time="2022-05-29T11:26:04.473603648Z" level=info msg="Starting cached object TTL expiration scheduler..." go.version=go1.11.2 instance.id=f53bfead-3afc-4d5d-a652-6560ee54b574 service=registry version=v2.7.1
ui-as-standalone-registry-1  | time="2022-05-29T11:26:05.493367821Z" level=info msg="Discovered token authentication URL: https://auth.docker.io/token" go.version=go1.11.2 instance.id=f53bfead-3afc-4d5d-a652-6560ee54b574
ui-as-standalone-registry-1  | time="2022-05-29T11:26:05.49357348Z" level=info msg="Registry configured as a proxy cache to https://registry-1.docker.io" go.version=go1.11.2 instance.id=f53bfead-3afc-4d5d-a652-6560ee54b574 service=registry version=v2.7.1
ui-as-standalone-registry-1  | time="2022-05-29T11:26:05.493651311Z" level=warning msg="Registry does not implement RempositoryRemover. Will not be able to delete repos and tags" go.version=go1.11.2 instance.id=f53bfead-3afc-4d5d-a652-6560ee54b574 service=registry version=v2.7.1
ui-as-standalone-registry-1  | time="2022-05-29T11:26:05.494385745Z" level=info msg="listening on [::]:5000" go.version=go1.11.2 instance.id=f53bfead-3afc-4d5d-a652-6560ee54b574 service=registry version=v2.7.1
ui-as-standalone-ui-1        | /docker-entrypoint.sh: /docker-entrypoint.d/ is not empty, will attempt to perform configuration
ui-as-standalone-ui-1        | /docker-entrypoint.sh: Looking for shell scripts in /docker-entrypoint.d/
ui-as-standalone-ui-1        | /docker-entrypoint.sh: Launching /docker-entrypoint.d/10-listen-on-ipv6-by-default.sh
ui-as-standalone-ui-1        | 10-listen-on-ipv6-by-default.sh: info: Getting the checksum of /etc/nginx/conf.d/default.conf
ui-as-standalone-ui-1        | 10-listen-on-ipv6-by-default.sh: info: /etc/nginx/conf.d/default.conf differs from the packaged version
ui-as-standalone-ui-1        | /docker-entrypoint.sh: Launching /docker-entrypoint.d/20-envsubst-on-templates.sh
ui-as-standalone-ui-1        | /docker-entrypoint.sh: Launching /docker-entrypoint.d/30-tune-worker-processes.sh
ui-as-standalone-ui-1        | /docker-entrypoint.sh: Launching /docker-entrypoint.d/90-docker-registry-ui.sh
ui-as-standalone-ui-1        | /docker-entrypoint.sh: Configuration complete; ready for start up
ui-as-standalone-ui-1        | 2022/05/29 11:26:06 [notice] 1#1: using the "epoll" event method
ui-as-standalone-ui-1        | 2022/05/29 11:26:06 [notice] 1#1: nginx/1.21.6
ui-as-standalone-ui-1        | 2022/05/29 11:26:06 [notice] 1#1: built by gcc 10.3.1 20211027 (Alpine 10.3.1_git20211027)
ui-as-standalone-ui-1        | 2022/05/29 11:26:06 [notice] 1#1: OS: Linux 5.15.26-sunxi64
ui-as-standalone-ui-1        | 2022/05/29 11:26:06 [notice] 1#1: getrlimit(RLIMIT_NOFILE): 1048576:1048576
ui-as-standalone-ui-1        | 2022/05/29 11:26:06 [notice] 1#1: start worker processes
ui-as-standalone-ui-1        | 2022/05/29 11:26:06 [notice] 1#1: start worker process 45
ui-as-standalone-ui-1        | 2022/05/29 11:26:06 [notice] 1#1: start worker process 46
ui-as-standalone-ui-1        | 2022/05/29 11:26:06 [notice] 1#1: start worker process 47
ui-as-standalone-ui-1        | 2022/05/29 11:26:06 [notice] 1#1: start worker process 48
Now the service is running.
Currently the service is not running as a daemon. You need to create your own service unit to run this service as a daemon on reboot, which is not covered here.
Use the registry
Now on your host run this command:
1
docker login --username <user> --password <pass> <sbc-ip>:5000
Where:
<user>, the usename that you defined in the htpasswd step above.<pass>, the password that you defined in the htpasswd step above.<sbc-ip>, the IP address of the SBC
The output should be something like this:
1
2
3
4
5
6
WARNING! Using --password via the CLI is insecure. Use --password-stdin.
WARNING! Your password will be stored unencrypted in /home/dimtass/.docker/config.json.
Configure a credential helper to remove this warning. See
https://docs.docker.com/engine/reference/commandline/login/#credentials-store

Login Succeeded
Now you’re logged in.
Since the proxy is enabled you can use you registry to also mirror images like this:
1
docker pull 192.168.0.79:5000/library/nginx
The above command will pull the nginx image in your registry library and then pull it locally on your host.
You can also push images like this:
1
2
3
docker pull <docker-hub-image-name>
docker tag <docker-hub-image-name> 192.168.0.79:5000/<docker-hub-image-name>
docker push 192.168.0.79:5000/<docker-hub-image-name>
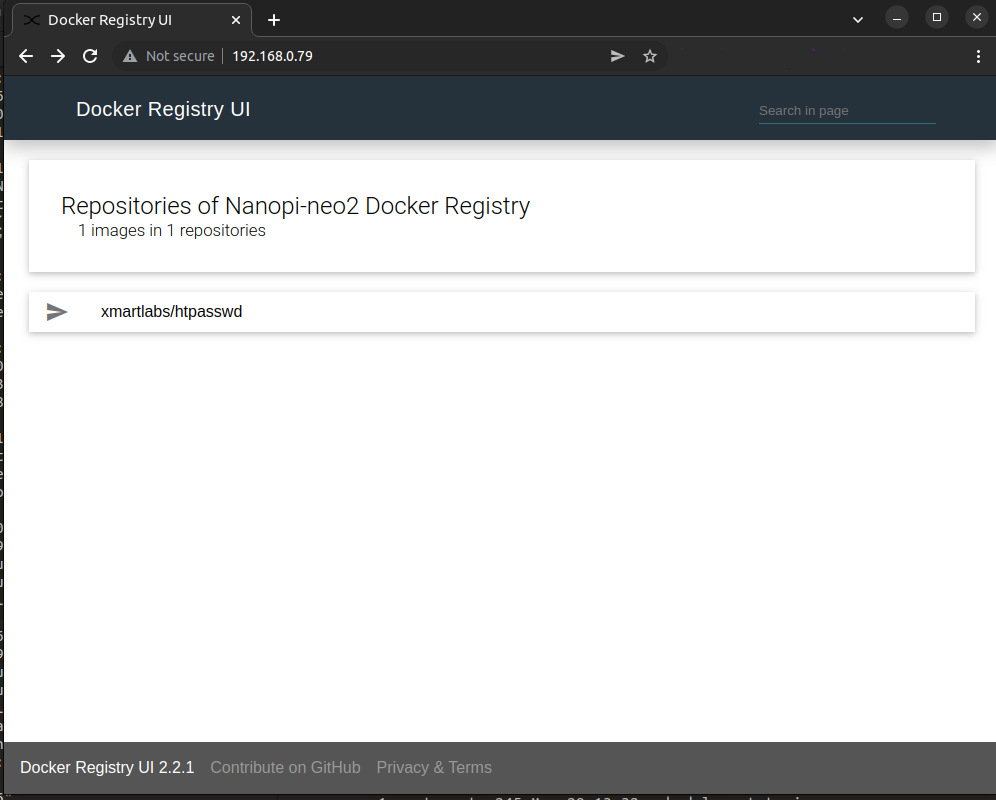
For example, during this post I’ve used the xmartlabs/htpasswd to create the docker registry username:password, therefore, the image is already on my host. Therefore, in order to push the image to my private registry I need to execute the following commands.
1
2
docker tag xmartlabs/htpasswd 192.168.0.79:5000/xmartlabs/htpasswd
docker push 192.168.0.79:5000/xmartlabs/htpasswd
Then you can see the image in the ui
Conclusion
If everything worked as expected, then you should have your own docker registry hosted on your SBC. I’ve done some trivial tests on the nanopi-neo2 and it’s more than enough for my own purposes, even if it’s a low spec SBC. You could also install all the tools without using docker-compose, but I really can’t find any reason to go through the complexity of doing that, since docker works fine even on the nanopi-neo2.
So, if you want to run your own registry on any SBC then this guide takes you step-by-step through the process.
Have fun!
Comments powered by Disqus.